2. Importing data
Tip
It'll be easier to keep the VM Chrome Remote Desktop in fullscreen.
You can open the tutorial website inside the VM as you're working through it so you don't have to switch in and out of fullscreen mode.
To do this, just launch Google Chrome from the bottom dock and navigate to cosyne.sleap.ai.
The input to SLEAP are video files, so we'll first need to load some data to work with.
For this tutorial, we've prepared a couple of videos that are representative of a typical behavioral setup in the lab. To access it, just double-click the cosyne-tutorial-data folder in the desktop:
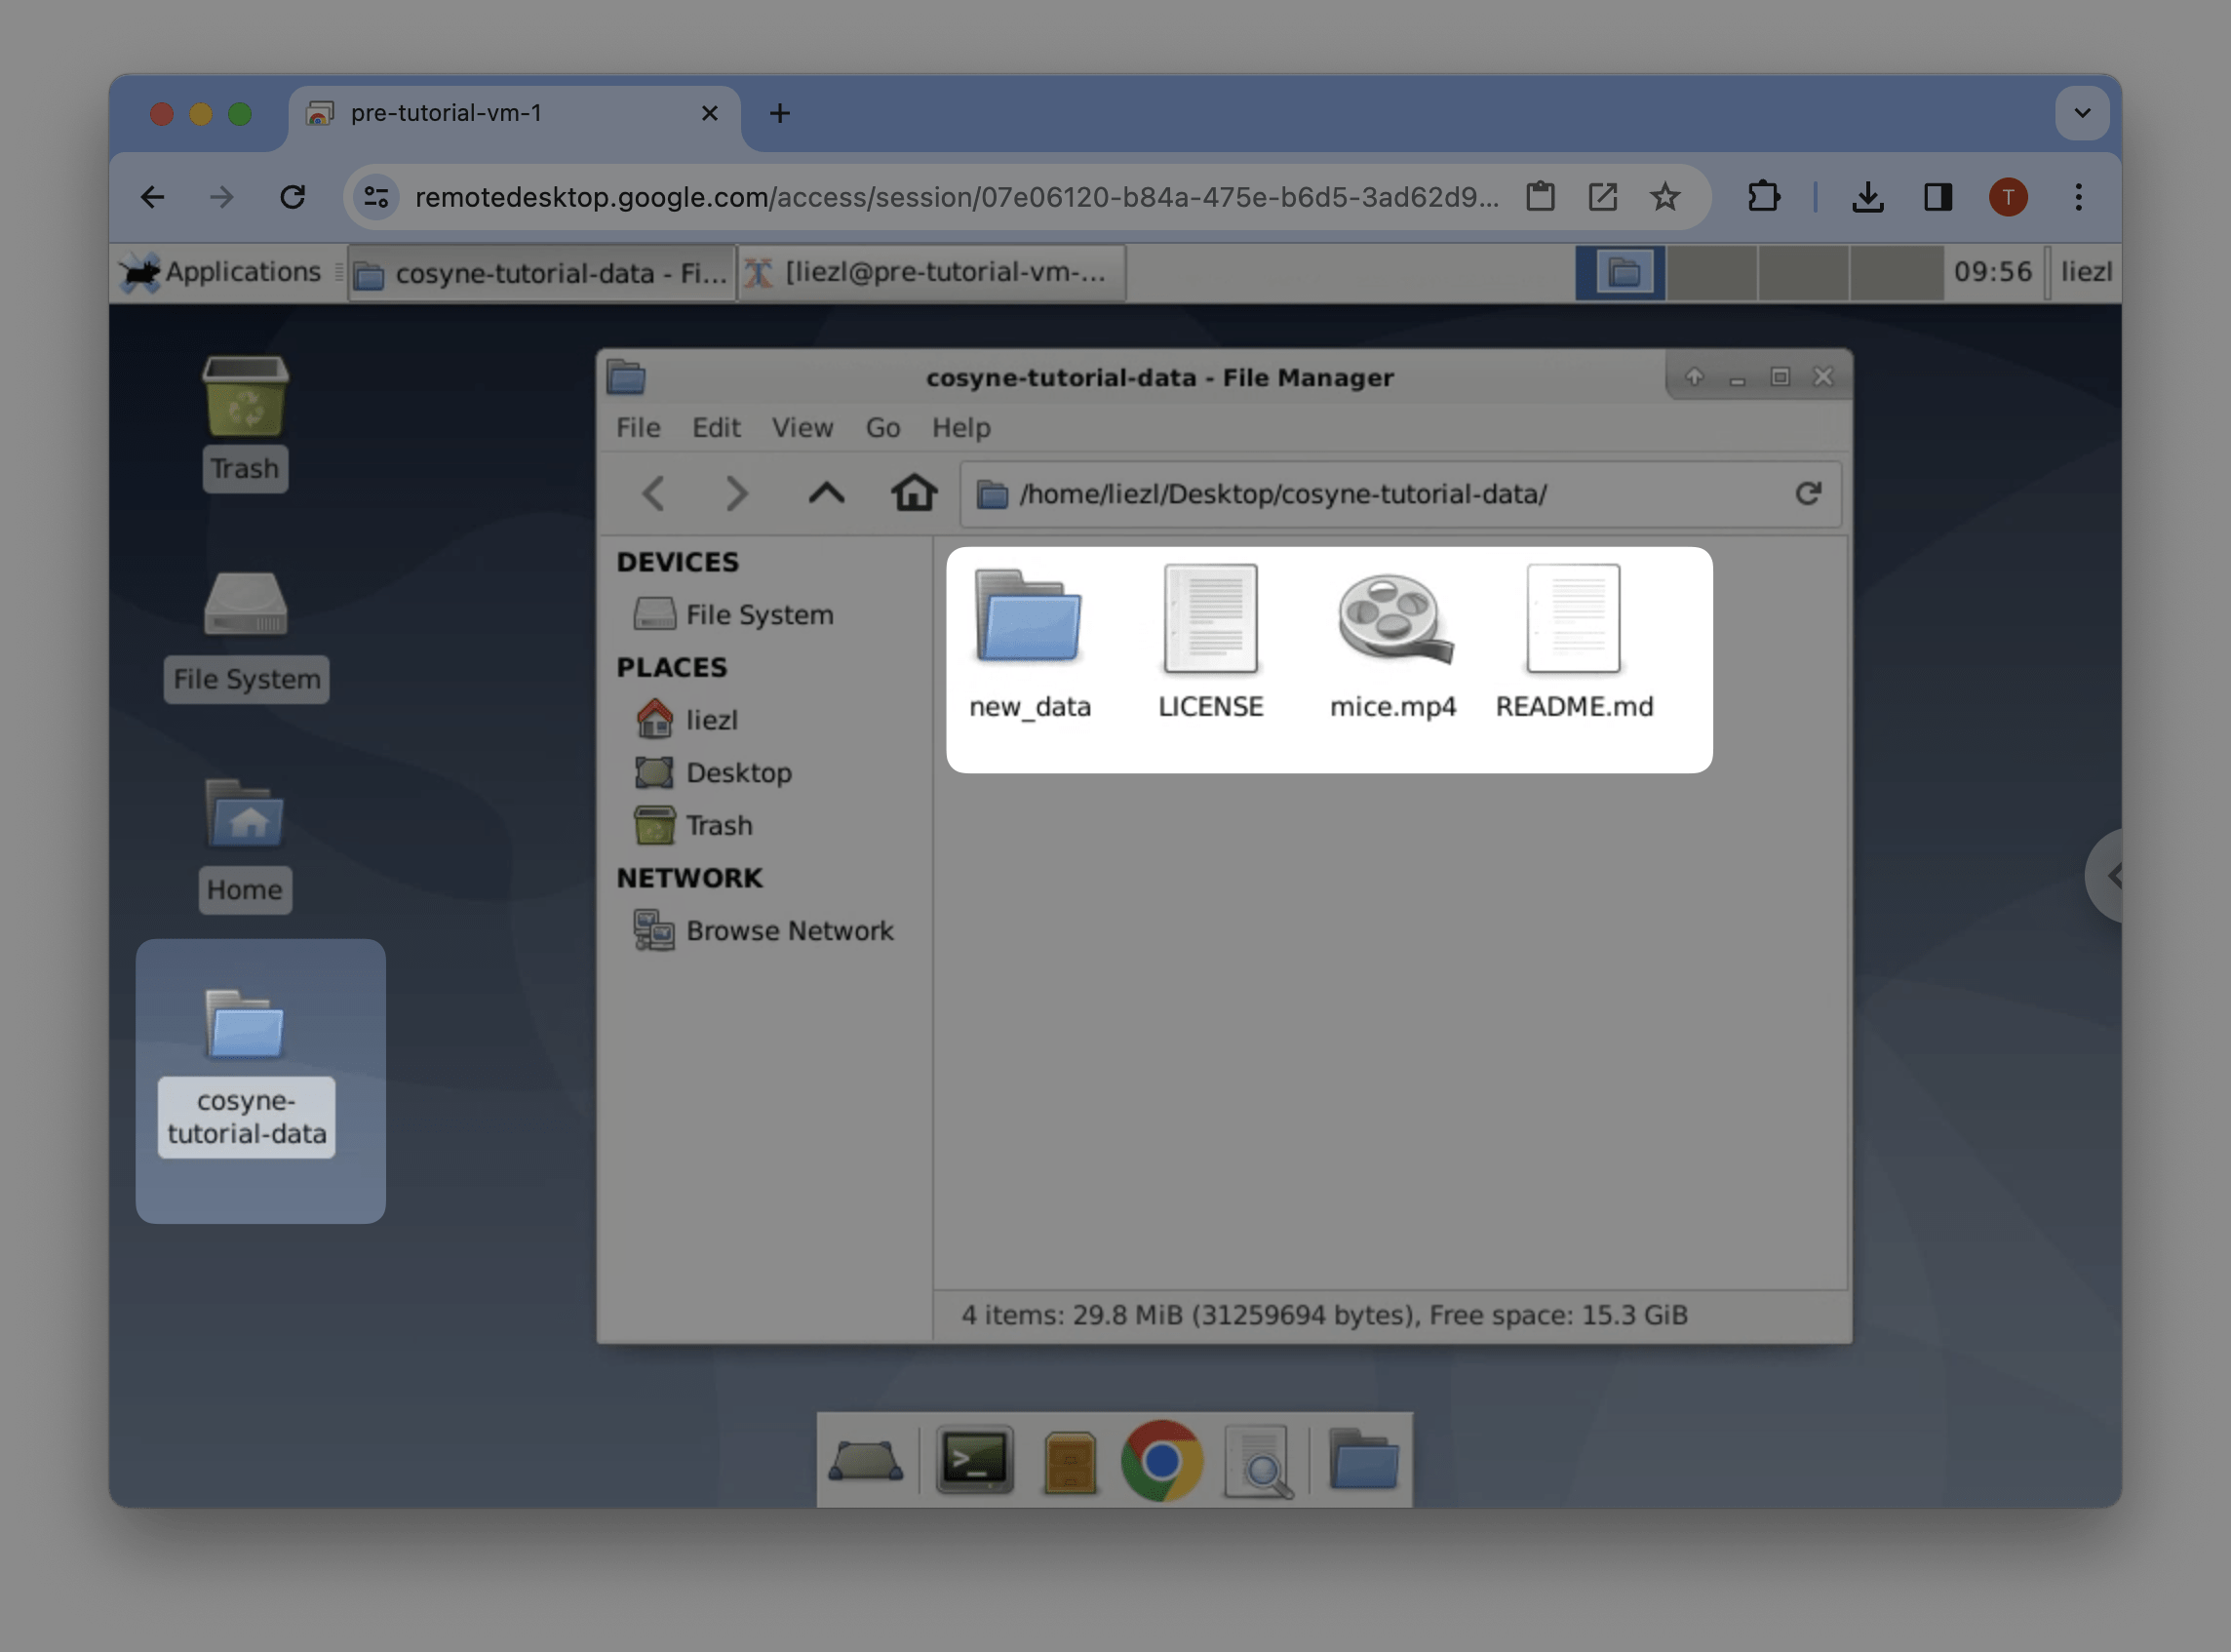
The mice.mp4 will be the main video we will use for training a model in this tutorial. The new_data folder will be used later in step 6.
Note
If you are working locally, you can get this data by cloning the data repository:
You do not need to run this in the VM!
Import videos into SLEAP
-
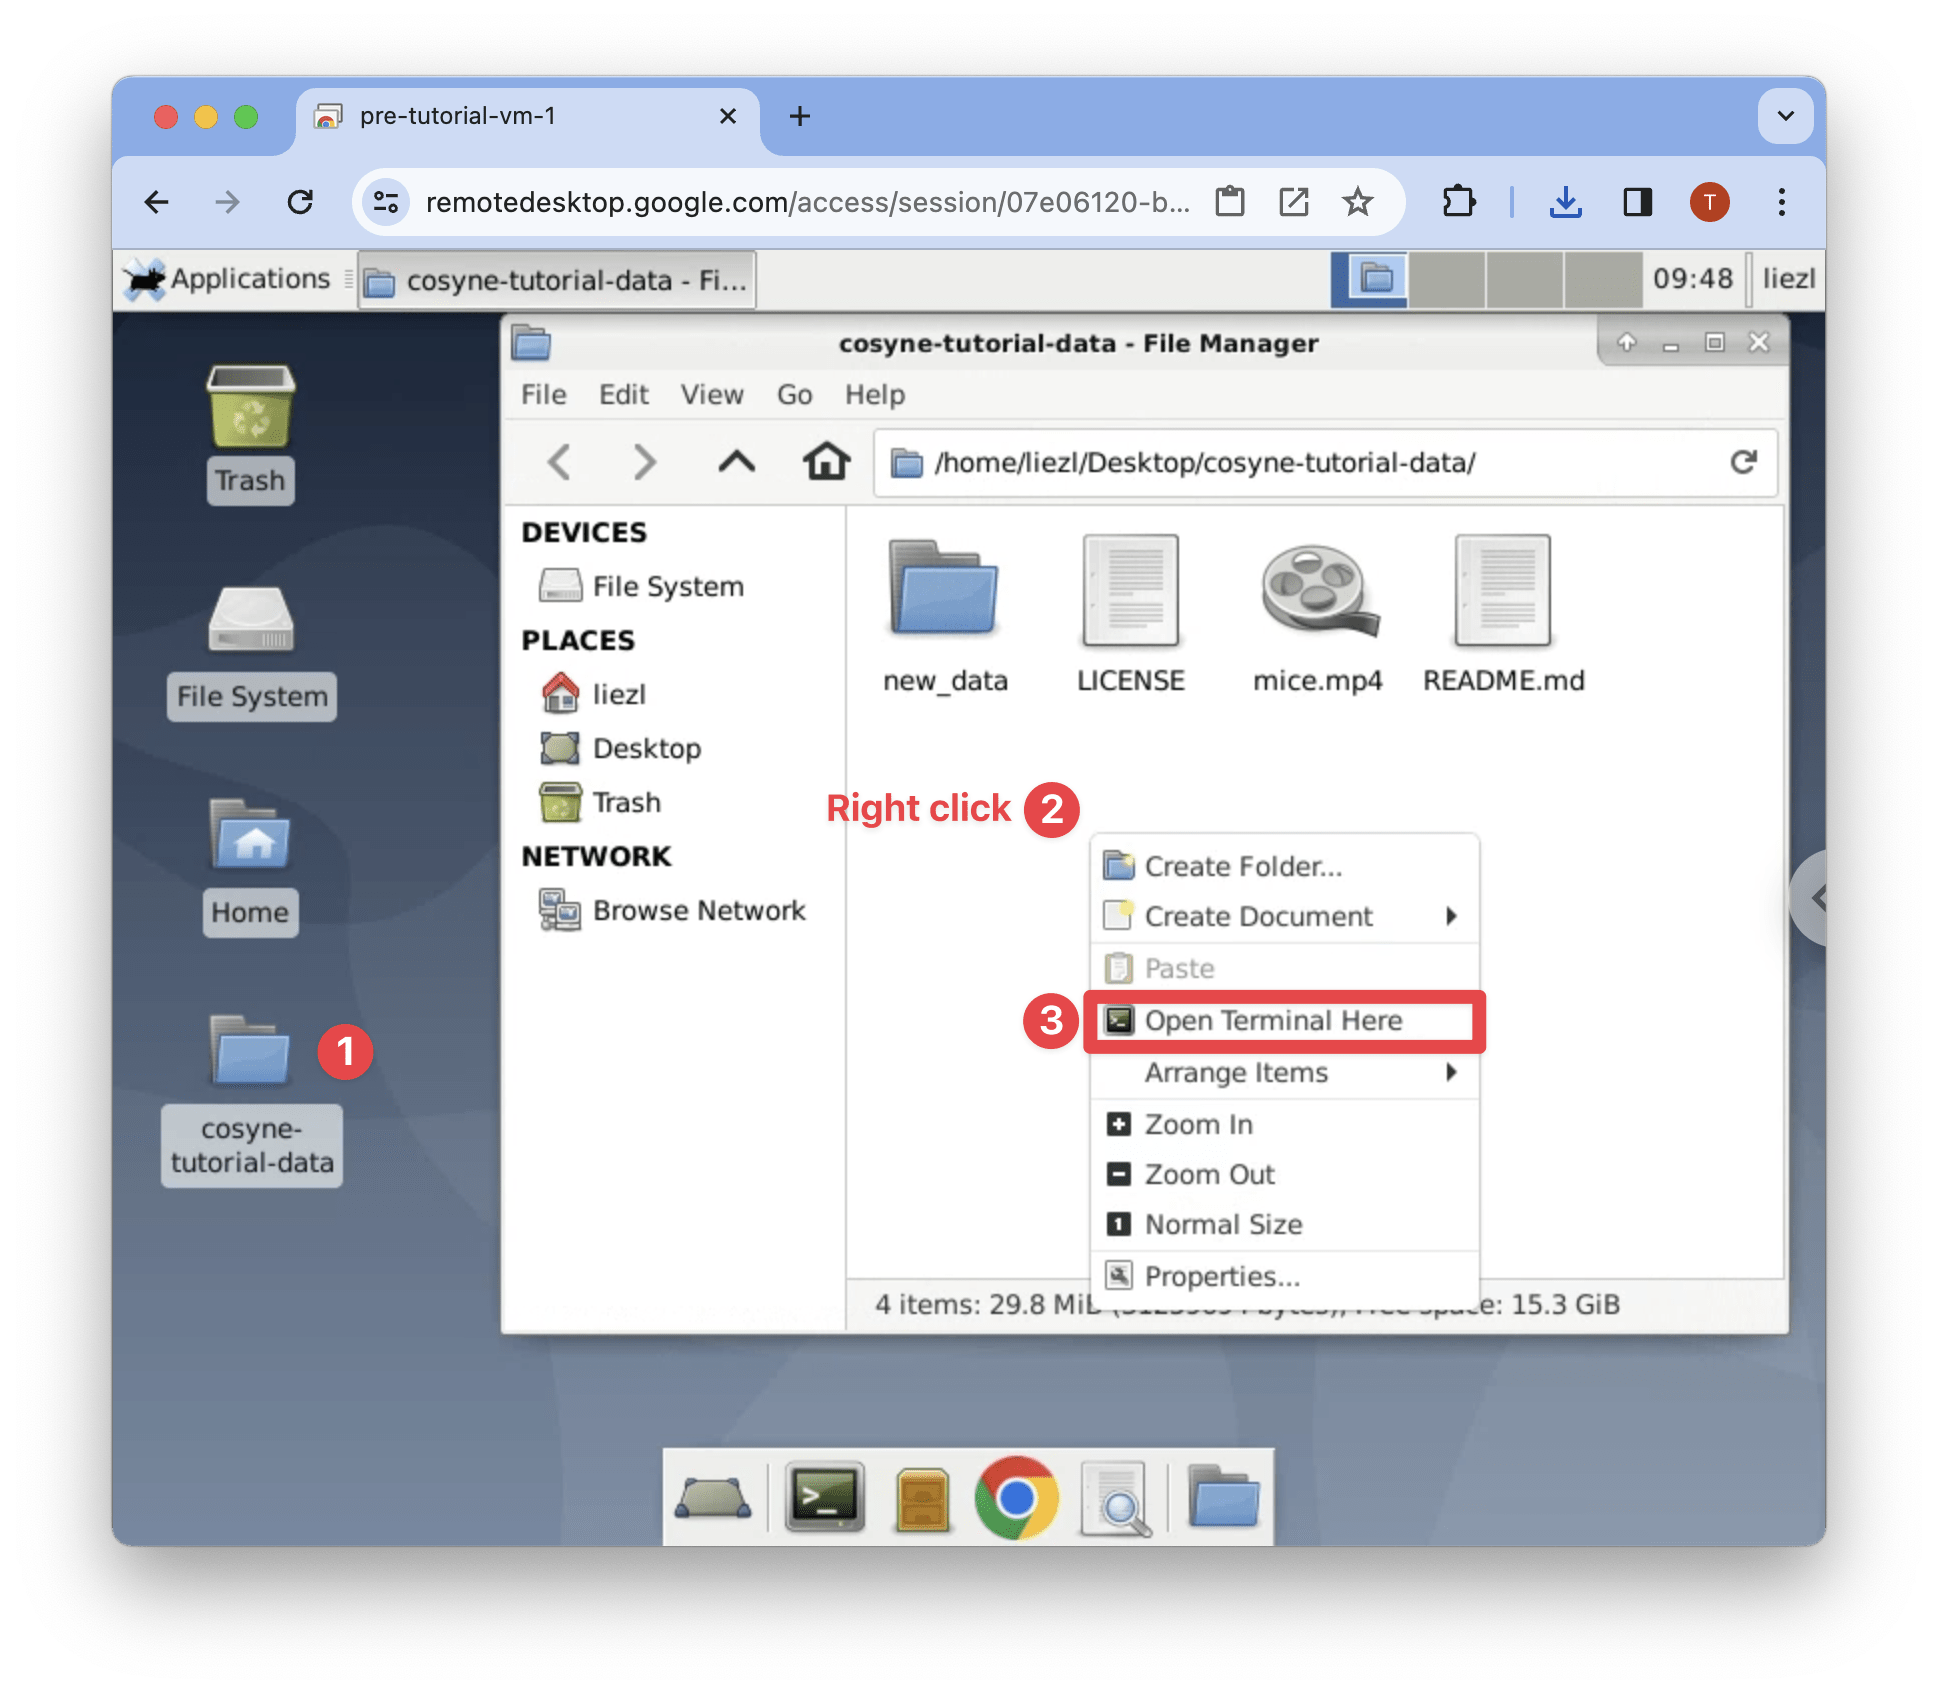
Open a terminal by right-clicking the background of the tutorial data folder and selecting Open Terminal Here:
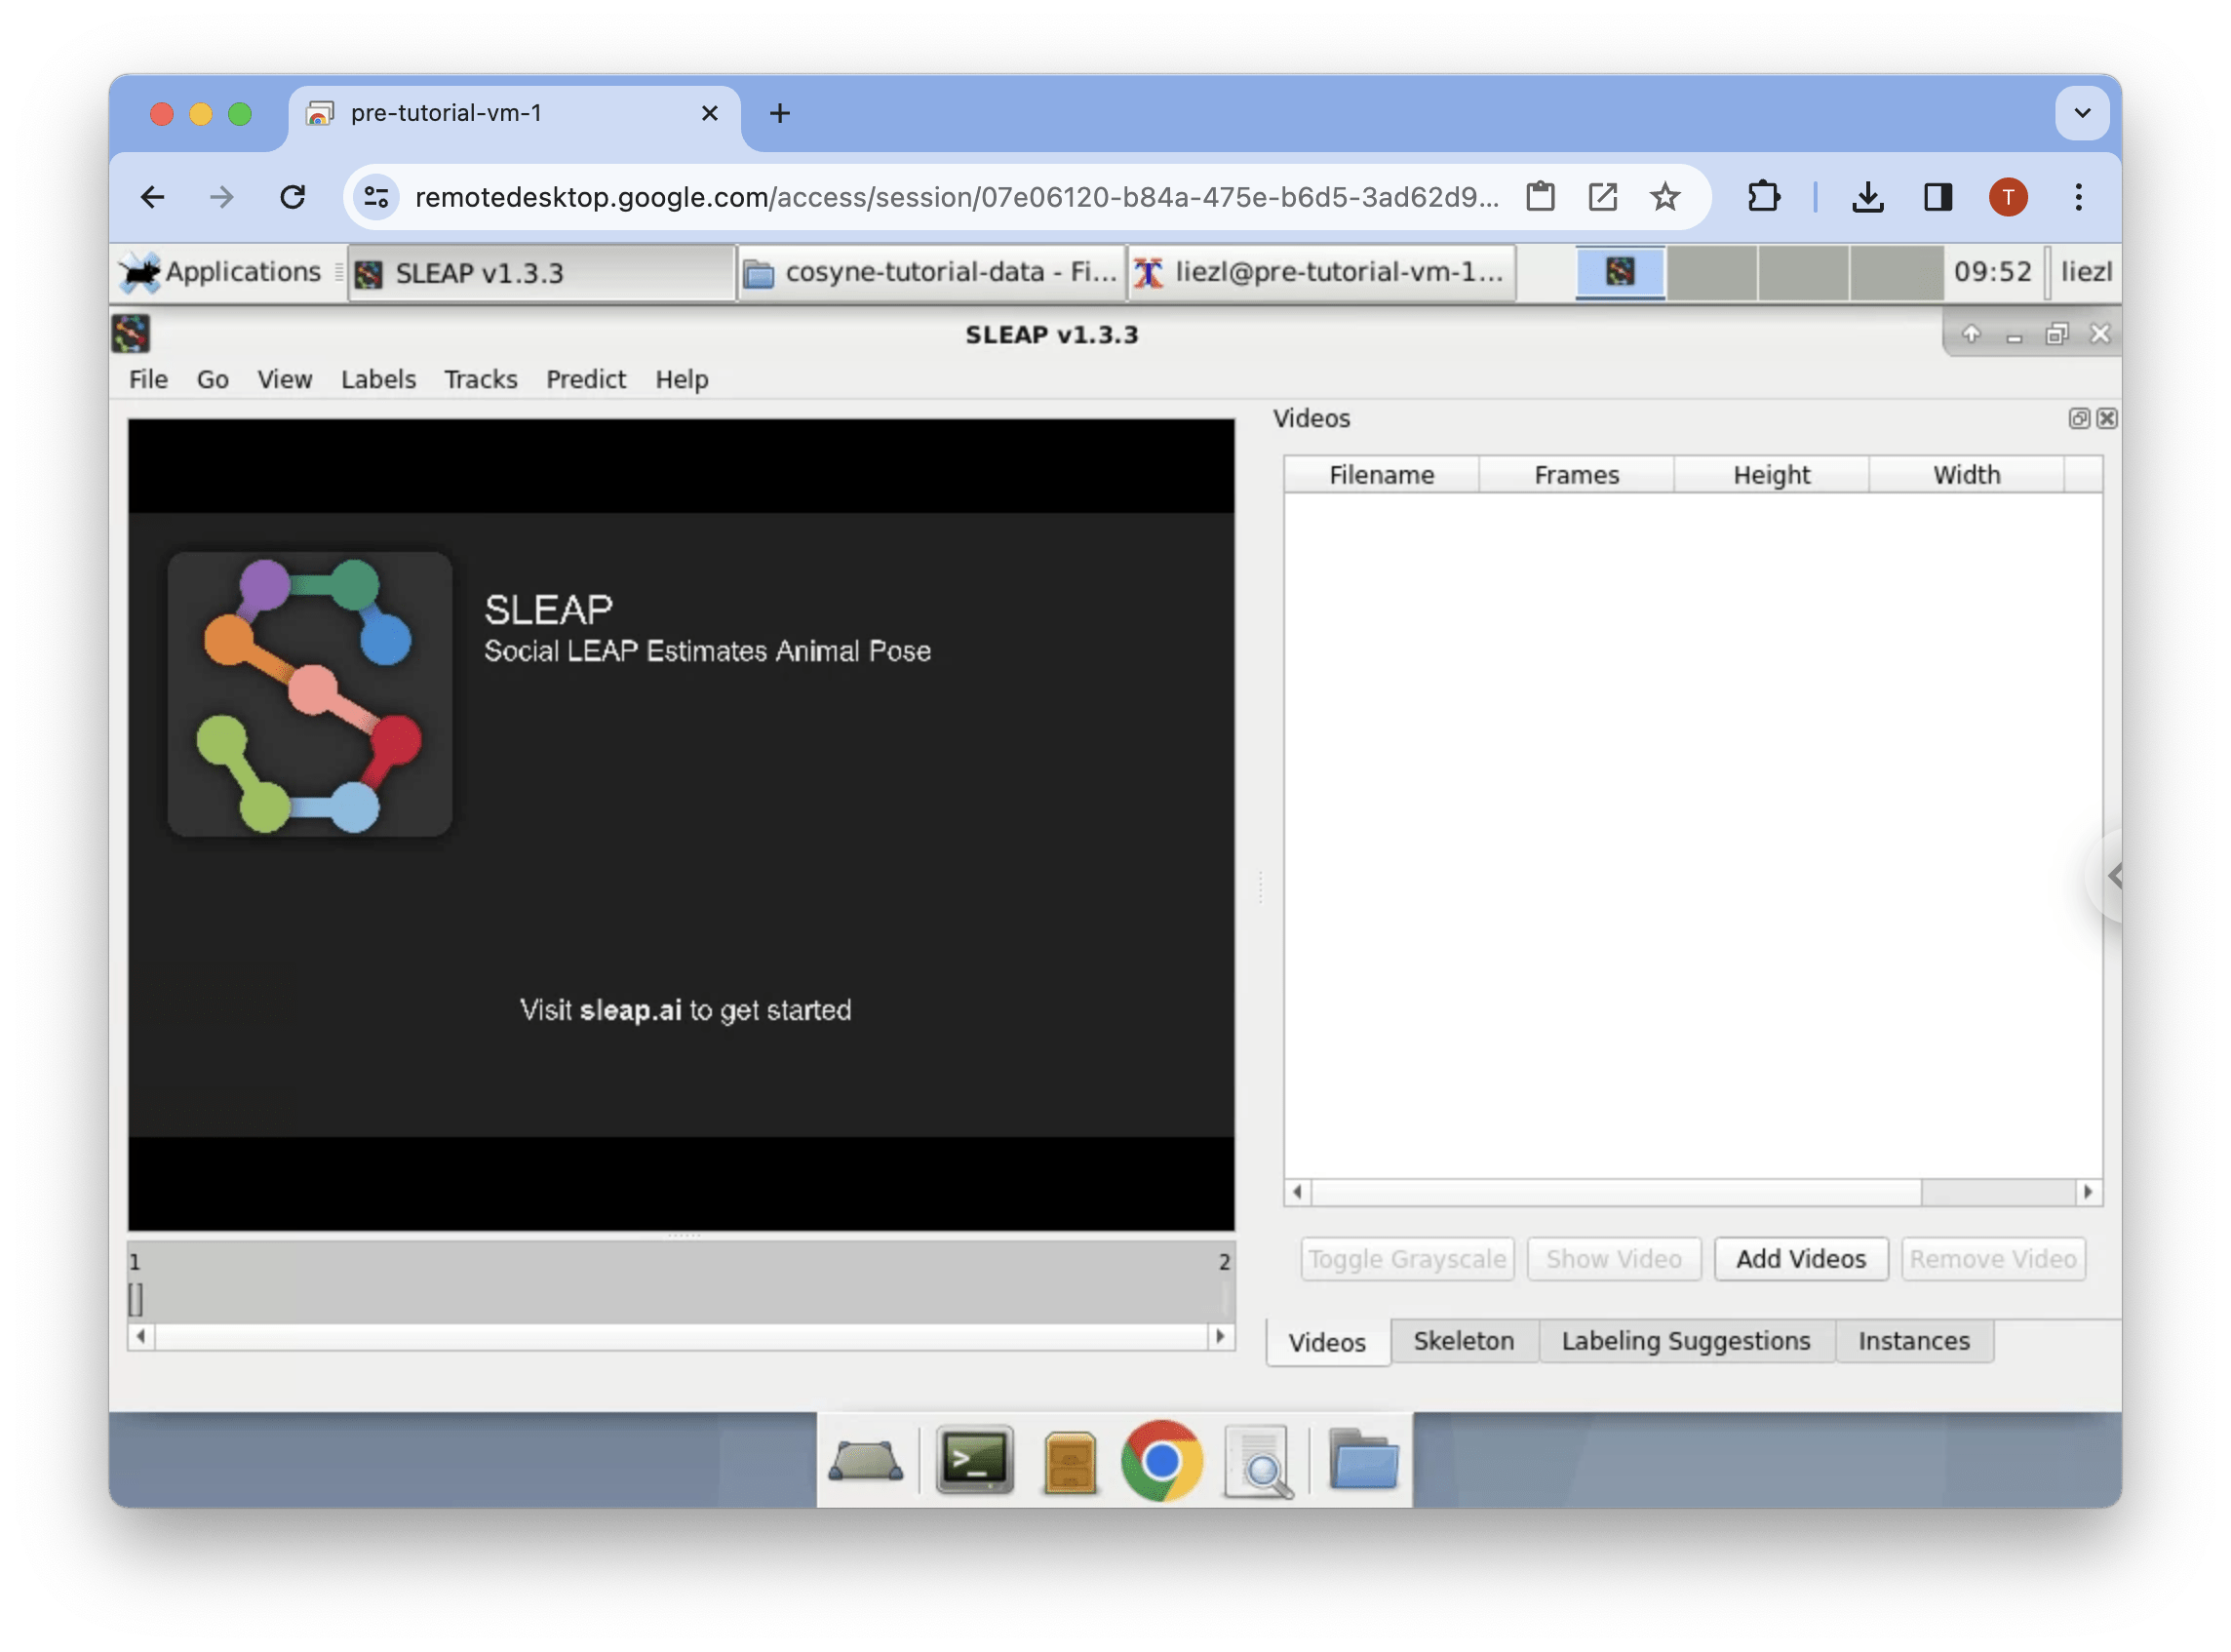
Then launch the SLEAP GUI by typing this command followed by Enter:
-
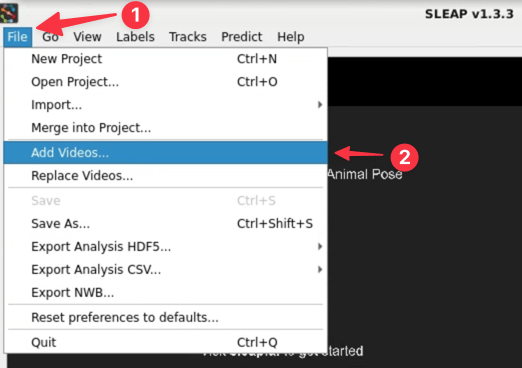
Go to File → Add Videos... to open the file browser.
-
Double click the
videosfolder, select all of the videos and click Open.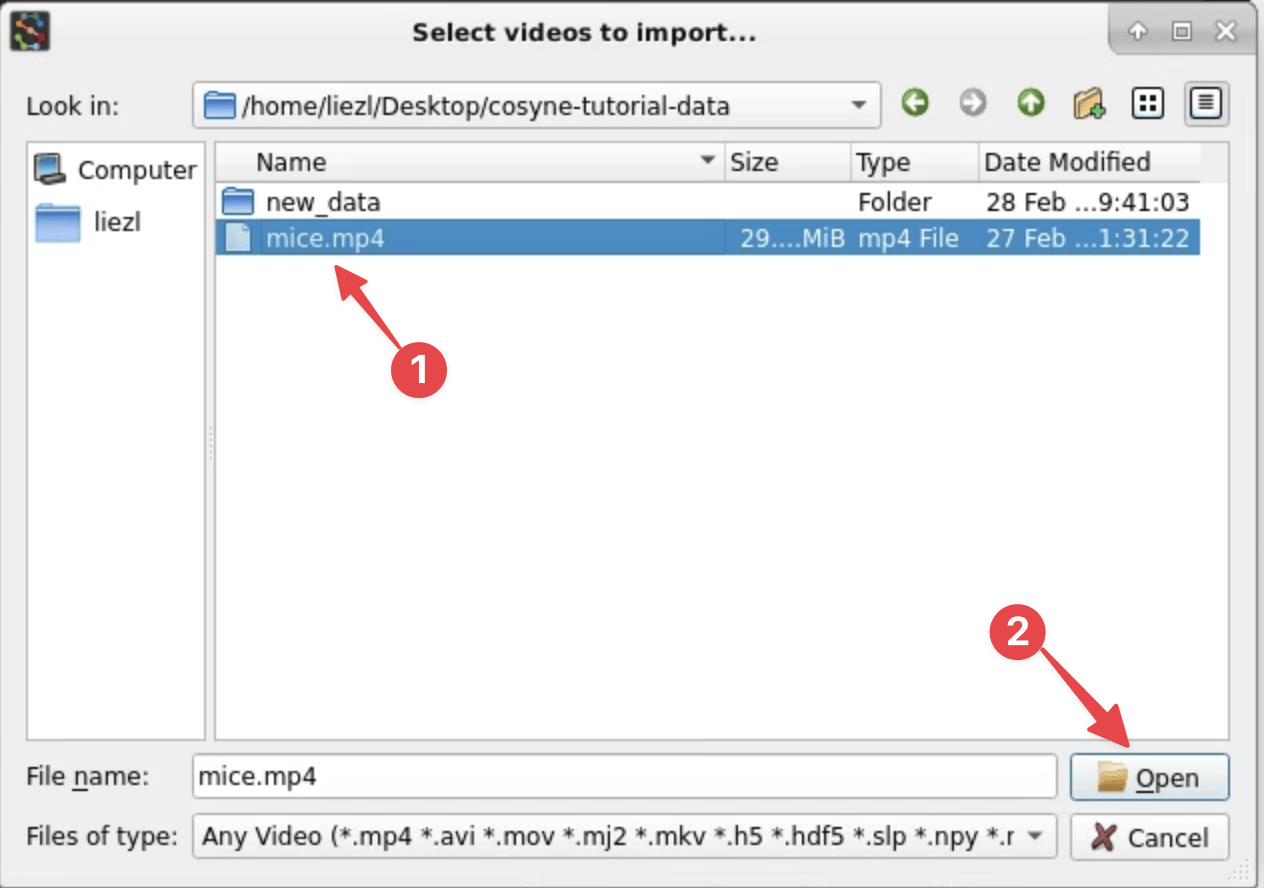
-
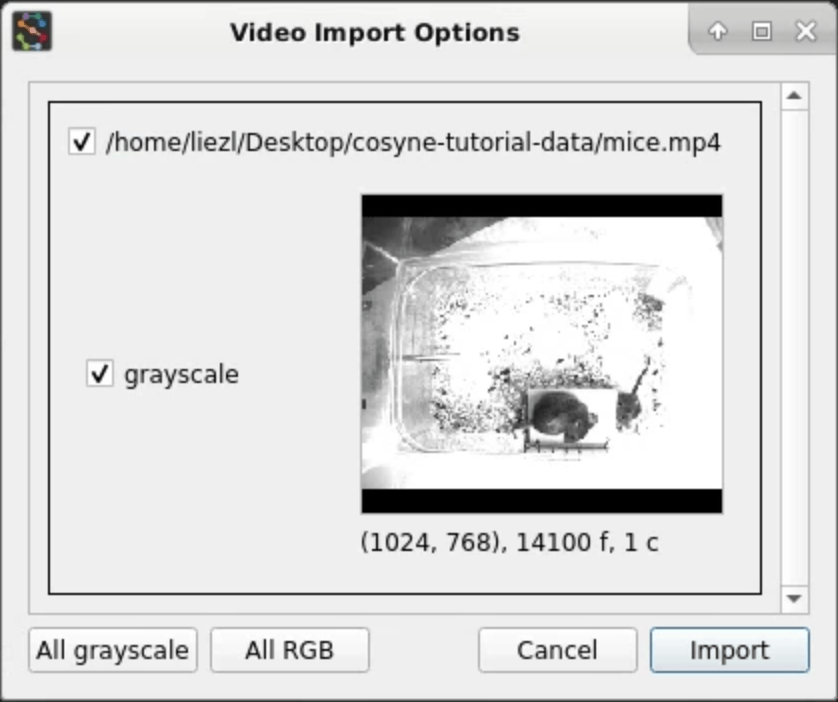
The video import interface will appear. Click Import to finish adding the videos.
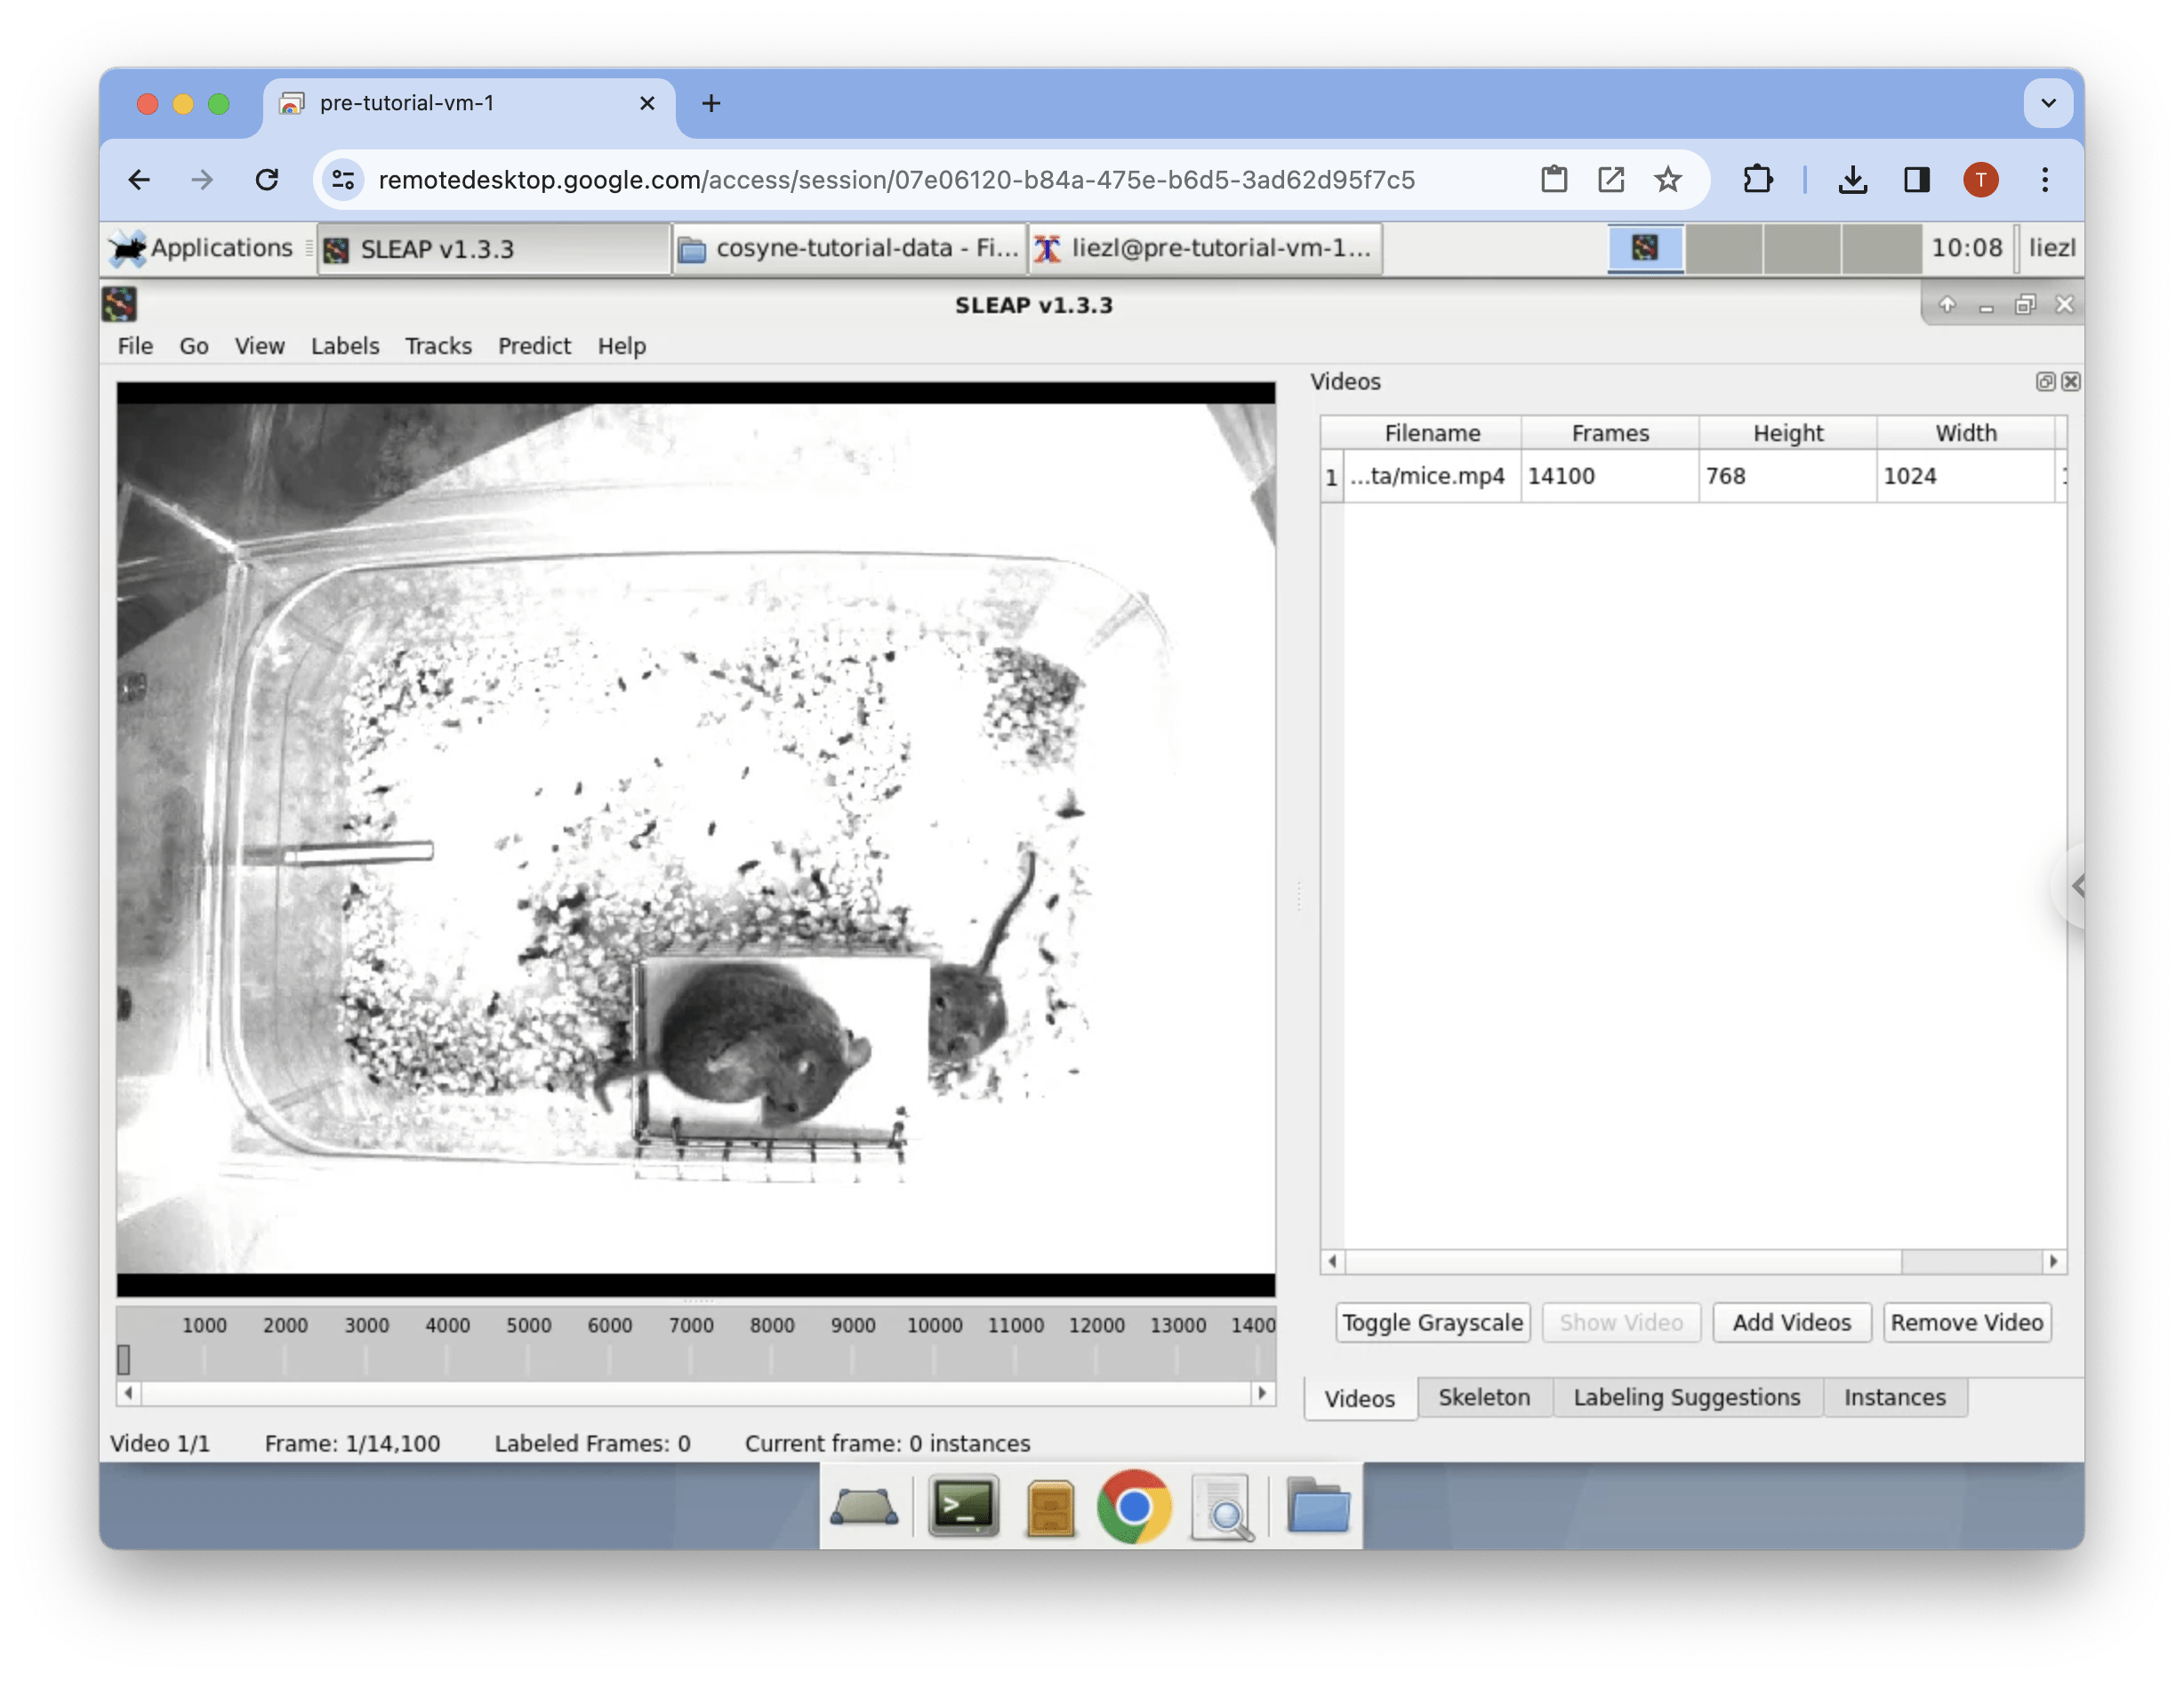
You'll now see the first video in the GUI:
Configure skeleton
-
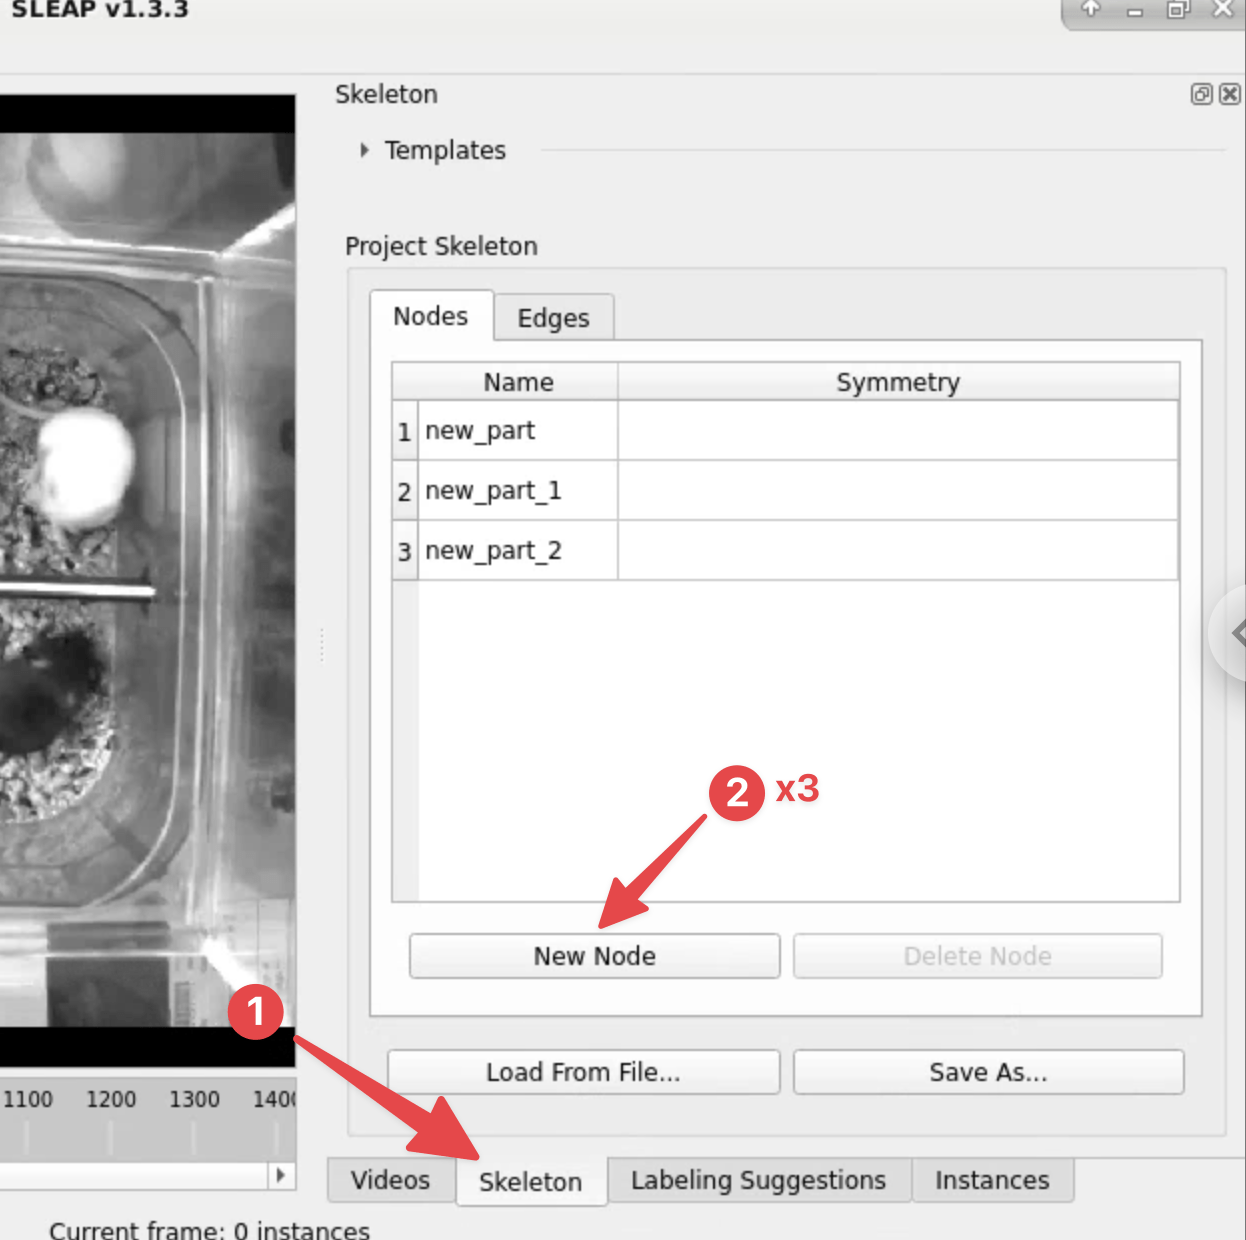
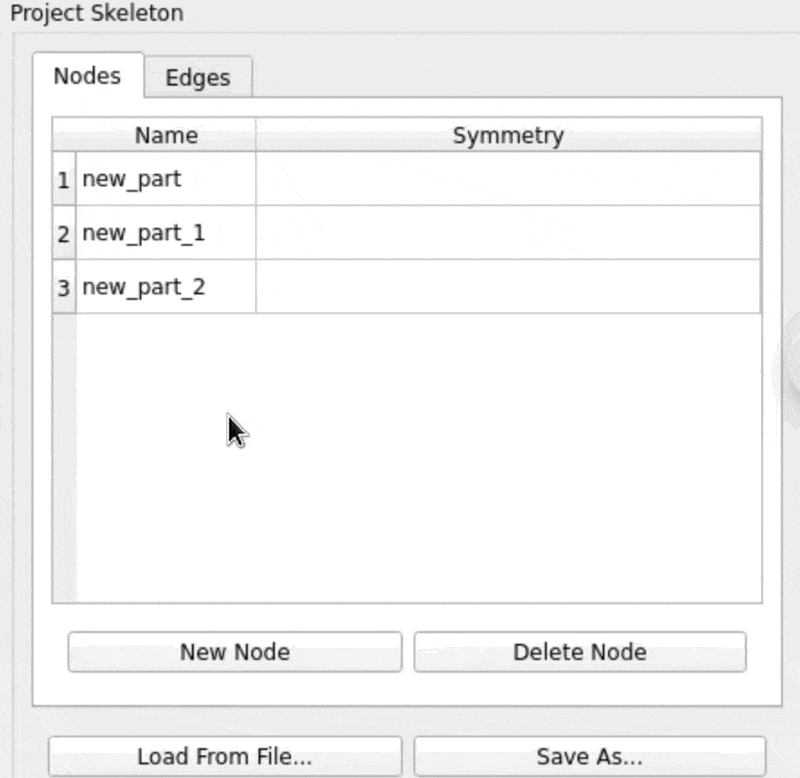
Click on the Skeleton tab on the right, then click on New Node three times to create three entries in the table.
-
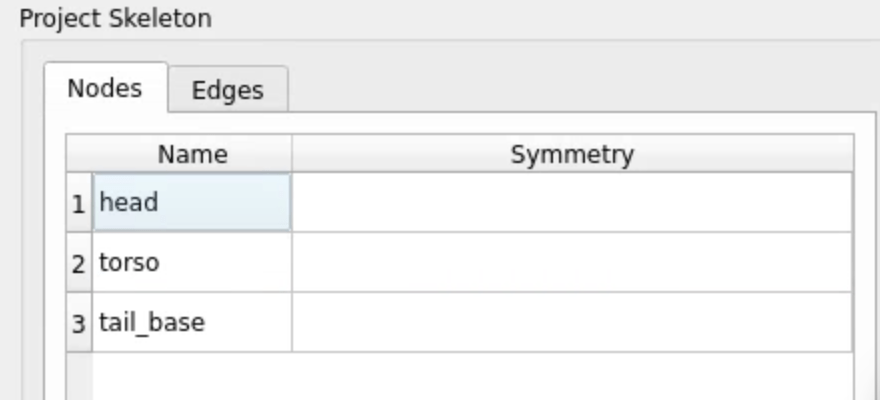
For each node, double-click on the name to edit it, then Enter to save.
Name them head, torso, and tail_base.
-
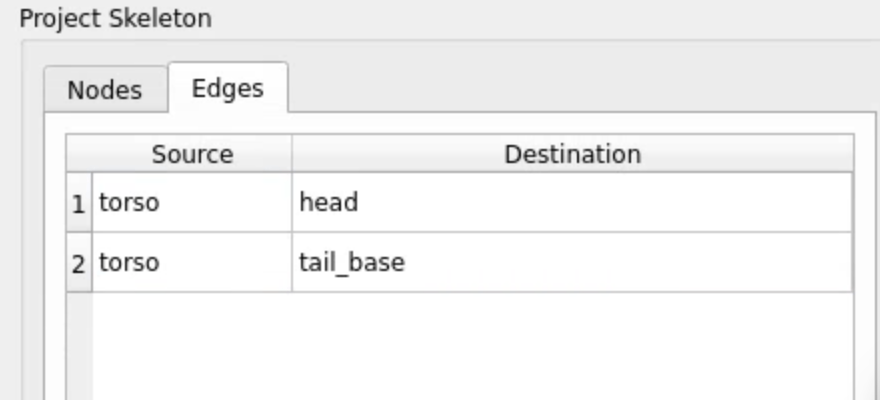
Switch to the Edges tab and add connections: torso → head, and torso → tail_base.

The final skeleton setup should look like this:
You did it! 